12-Bead Base

Please consider making a donation if you find this tutorial useful.

12 Bead Base

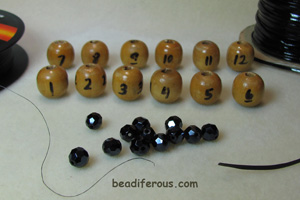
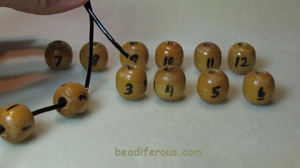
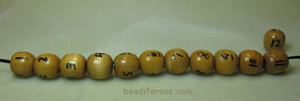
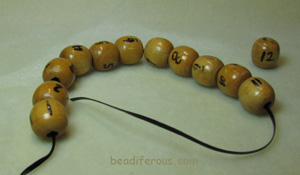
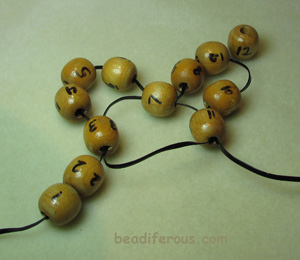
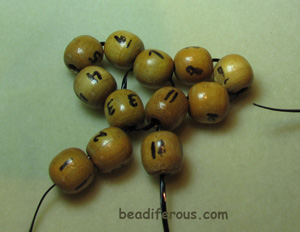
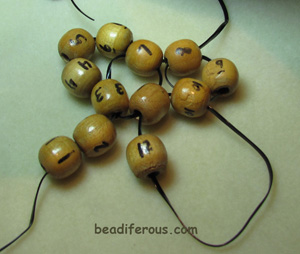
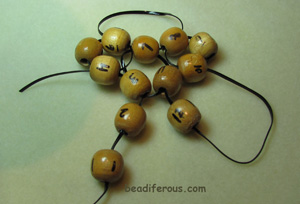
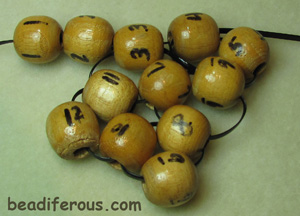
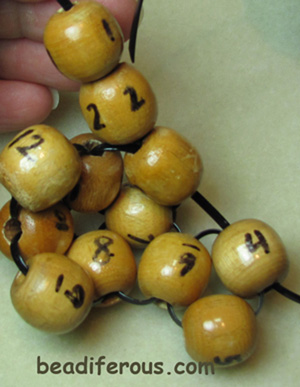
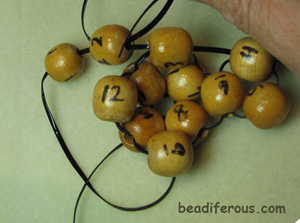
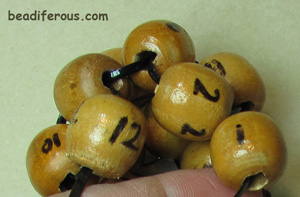
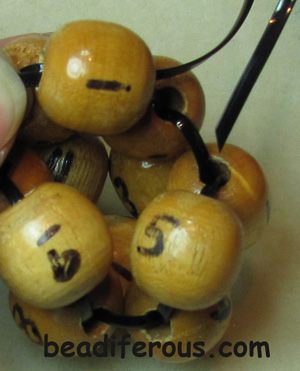
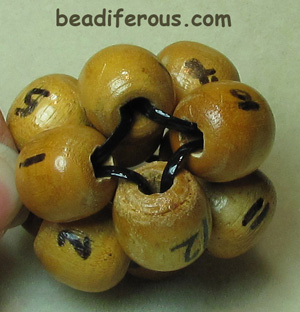
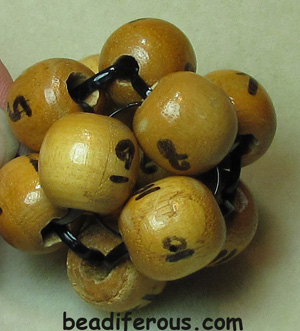
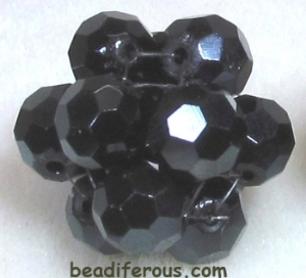
This tutorial describes the steps necessary to create the 12-bead base pictured on the left.  With just a little practice the 12-bead base can be completed in about 10 minutes.

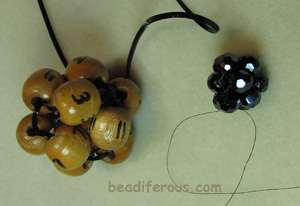
Possibilities for embellishment are infinite as you can see from some of the designs I have encluded.  Depending on the size of beads used in the base you can make earrings, pendants, Christmas tree decorations, sun catchers to hang in the window, or even make a bunch and set them in a pretty dish.


Numbered wooden beads have been used for this tutorial.

 The black beads are 8mm.  I find that the faceted beads form a tighter and more solid embellished bead, but round beads work beautifully too.  My selection for the stringing material is 6 pound Fireline.

Important points:

  • Stringing will always be from the top down through the beads. 
  • All stitches are made using the right end of the stringing material.
  • Tighten the beads between stitches.

String beads 1 through 11 from the top down.  Slide the beads down the string to the left until there is only 5 inches exiting from bead 1.

The next stitch will go in the same direction by stringing from the top of the bead down.

Stitch through beads 3, 7 and 11 in the downward direction creating a 3-bead group (group 1, 3-7-11).  

 This bead will eventually consist of eight 3-bead groupings.  Keep an eye on these because it is easy to include an extra bead by accident.

Add bead 12 stringing from the top down.  String down bead 10 (group 2, 10-11-12).  Tighten.

String down bead 8 (group 3, 8-9-10).  Tighten.

String down bead 6 (group 4, 6-7-8), then down bead 4 (group 5, 4-5-6).  Tighten.

Status check before we zip it all together:  Your project should now look like this.  The beginning of the stringing material is in the upper left and the end of the stringing material is in the upper right.

Tighten up the project and it begins forming into a ball.

String down bead 2 (group 6, 2-3-4).  Tighten.

String down 12 then down 1 (group 7, 1-2-12).  Tighten.

String down 5, then string down 9 and tighten.  At this point the two ends of the string meet between beads 1 and 9.  Tie off using a surgeons knot (group 8, 1-5-9).  That's it!

Don't cut the thread because you can use the ends to embellish the bead later.

You will see six 4-bead intersections.  The thread should look like this.

As discussed and detailed within the tutorial, there are eight 3-bead groups.

Here are the two beads side-by-side.  The 12-bead base will be a bit loose until the embellishing is complete so don't worry about that.  Now go make beads!!!

This slide shows the embellished 12-bead base.  

Please refer to the Embellished 12-Bead Base Tutorial.

Please consider making a donation if you found this tutorial useful.